Task Cards
One task, one card. Add only as much detail as you need.
Cards are the basic unit of work in toodoori. Every card that moves across the kanban board is a task card: start light with just a title, then add detail as the work takes shape. There’s no need to fill in every field up front.
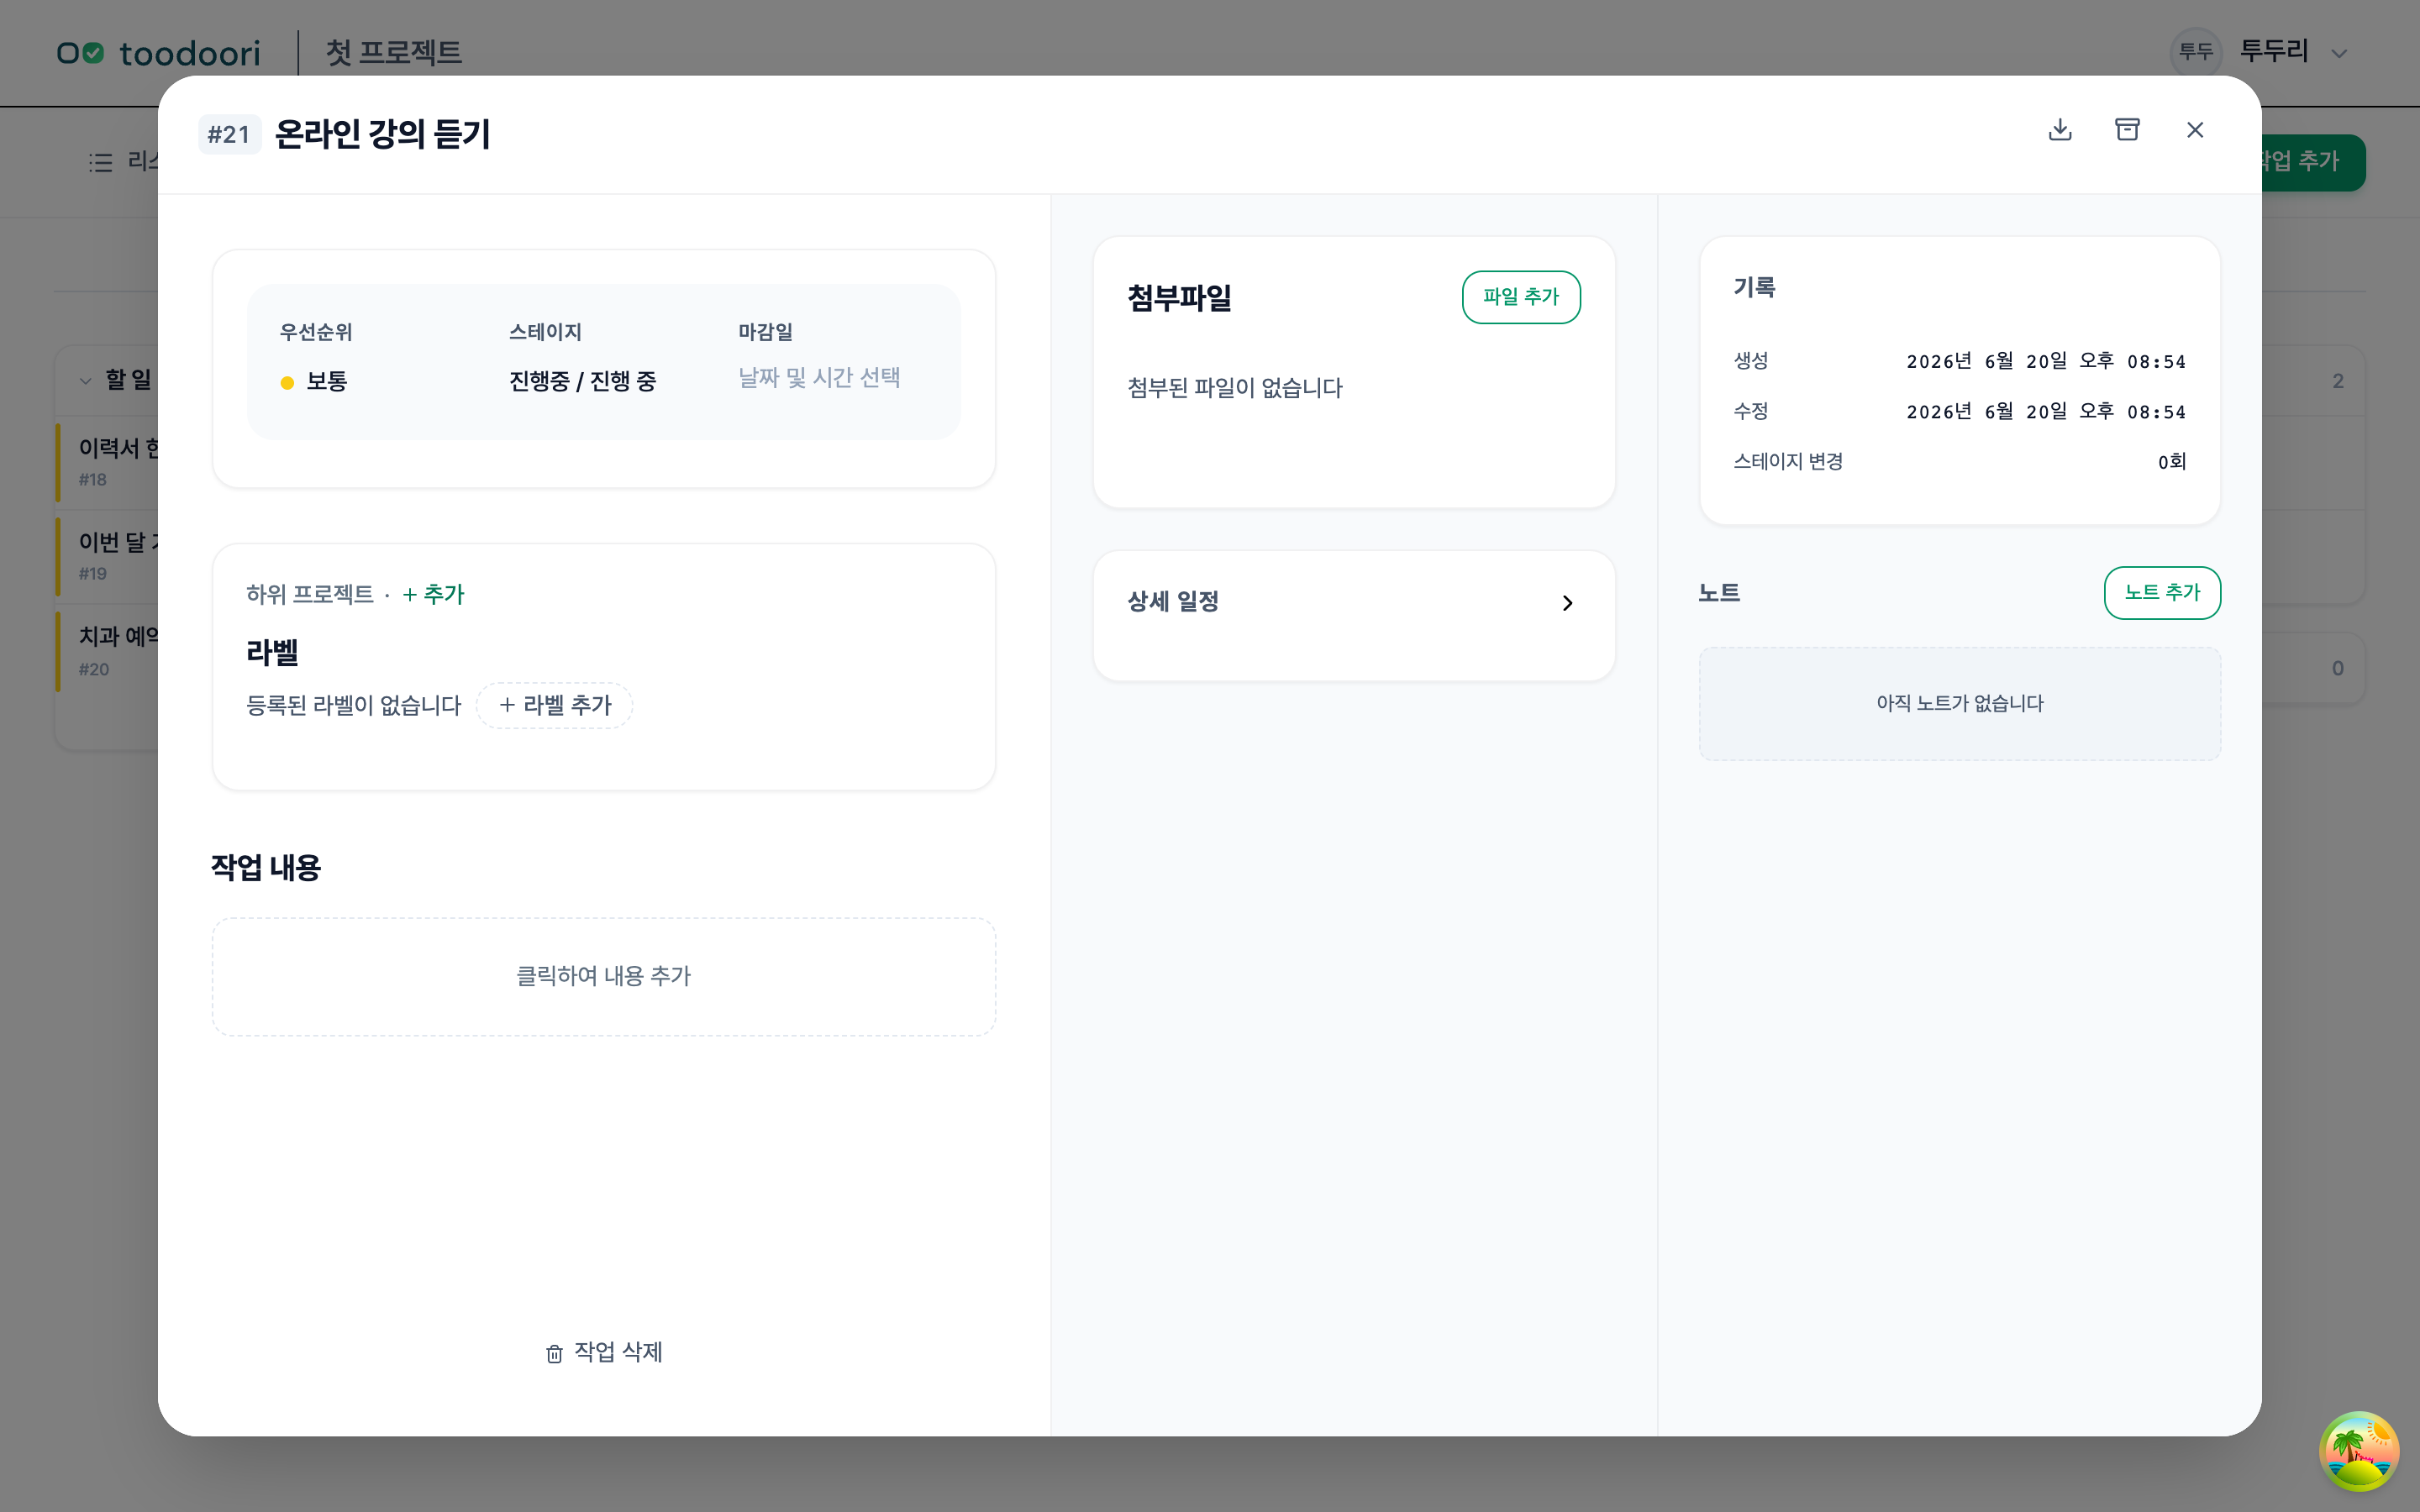
Where a card opens
Click a card and a detail panel opens on the right of the board. It isn’t a window covering the middle of the screen, so you can keep an eye on the board while you work on the card; on a narrow screen it expands to full width instead.
The panel runs as a single column, and only what currently holds a value is expanded. Tools that are still empty stay below as small chips and open in place when you click one. Fields you don’t use don’t take up room as empty boxes, while what you could still add stays visible.
What a card can hold
Open a task card and you can attach any of the following, whenever the work calls for it.
- Due date, priority, stage: always together at the top of the panel: by when, how much it matters, and which stage it is in right now.
- Content: describe the task and the result you want.
- Checklist: add items you can check off within the task. Each item can also have a due date.
- Subtasks: keep separately tracked tasks under a parent task.
- Attachments: keep reference files on the card. Images, Portable Document Format (PDF) files, and Markdown files open as previews in the app.
- Relations: link a card to others as Blocked by, Followed by, or Related. See Task Relations: Dependencies and Linked Tasks for how to link cards and show the whole chain in the flow view.
- Labels & sub-project: apply labels such as Study or Home, or group related tasks in a subproject.
- Notes: add memos in order as the work moves along.
- Schedule & records: planned and actual dates, plus a color band showing the stages the card passed through and how long it spent in each.
Choose which tools to enable for each project. The app sets their display order. See Make It Yours for details.
Add and complete checklist items
- On the board, open the card you want to work on. Its details appear in the panel.
- If the Checklist section is not open, select the Checklist chip near the bottom of the panel.
- In the Checklist section, select Add Item.
- Type an item such as
Check the contact link, then press Enter. The item appears at the top of the list, and the input stays open for another item. - Add any other items, then press Esc to close the empty input.
- After doing an item, select its checkbox. The item is marked complete and the completed count changes. Select it again to mark it incomplete.
If you cannot find the Checklist chip or section, enable Checklist under Task detail tools in project settings. Make It Yours explains those settings.
To edit an item, select its title, change the text, and press Enter. To give the item a due date, use its calendar control. New items appear first, so the displayed order is not an enforced sequence of steps.
For lists you can adapt, read Task Checklist Examples: 4 Checklists and a Template. For deciding whether work belongs in a checklist, a subtask, or a dependency between tasks, see Work Breakdown: Checklists, Subtasks, and Dependencies.
How you group and find cards by label or due date is covered in Organizing & Finding. To see how a card moves between stages on the board, visit the Kanban Board.
Worth reading next
- What is Personal Kanban?: the thinking behind using cards and boards for personal work
- Getting Started with toodoori: creating your first card and filling out the board